1st Place LesleyAnne B. (aka LAs-Cricut) and her Winter Book
2nd Place is Katie C. and her 2 page layout
3rd Place is Shelia with framed Christmas decor.
Thank you all for participating I loved seeing all the work and I had fun putting this together. I think after the holidays busy rush is over and everyone is not so busy (and we have a new year of donations available to businesses I will do another one.
Wednesday, December 2, 2009
Tuesday, December 1, 2009
Katie C.


I added the pictures to this one! Sorry I’m so stupid! The house is the left hand page and the ice skating page is the right hand page. Thanks again!
Materials Used:
Cricut
Gypsy
Carts – winter woodland, Christmas, gypsy wandering and gypsy font
Paper trimmer
Pop dots
Ink
Adhesive
Zig 2 way glue
Stampin up markers
Brayer
Scissors
Liquid appliqué
Paper glaze
Heat gun
Directions:
1. Cut 7 snowflakes from gypsy wandering @ 1”
2. cut snowman from winter woodland @ 3” with all pieces and assemble
3. cut sign from Christmas @ 2.5” with all pieces and assemble
4. cut monogram letter from gypsy font @ .963” and attach to sign
5. cut lamppost from Christmas @ 3” with all pieces and assemble
(I like to ink my pieces to add a little flare.)
6. cut house from winter woodland @ 7” with all pieces and assemble
7. cut 5 snowflakes from gypsy wandering @ 1”
(I like to use my brayer to rub the pieces of paper onto the mat before cutting.)
8. cut tree @ 6.5” and 5.5” from Christmas and assemble
(snow is done with liquid appliqué that has been heated with a heat gun.)
9. cut “The Magic of Winter” from winter woodland @ 3.5” with shadow and layers and assemble
10. cut snowman from winter woodland @ 3.3” with layers and assemble
11. cut trees from Christmas @ 6” and assemble
12. cut ice skater from winter woodland @ 3” and assemble
13. cut circle from gypsy wandering @ 8.7” x .6”
14. assemble pages using the picture as a guide
15. cut two photo mats @ 4x4 and 4.5x4.5”, ink and assemble
16. wrap ribbon around mats and tie a bow
17. cut a mat to measure 4x6 and 4.5x6.5”, ink and assemble
18. wrap a ribbon around mat and tie a bow
19. add mats to layout
Dawn,
I just wanted to thank you for doing this. It was a lot of fun to participate in. You are such a sweetheart!
Brenda C.


Hi Dawn here are the directions for my item for the contest,
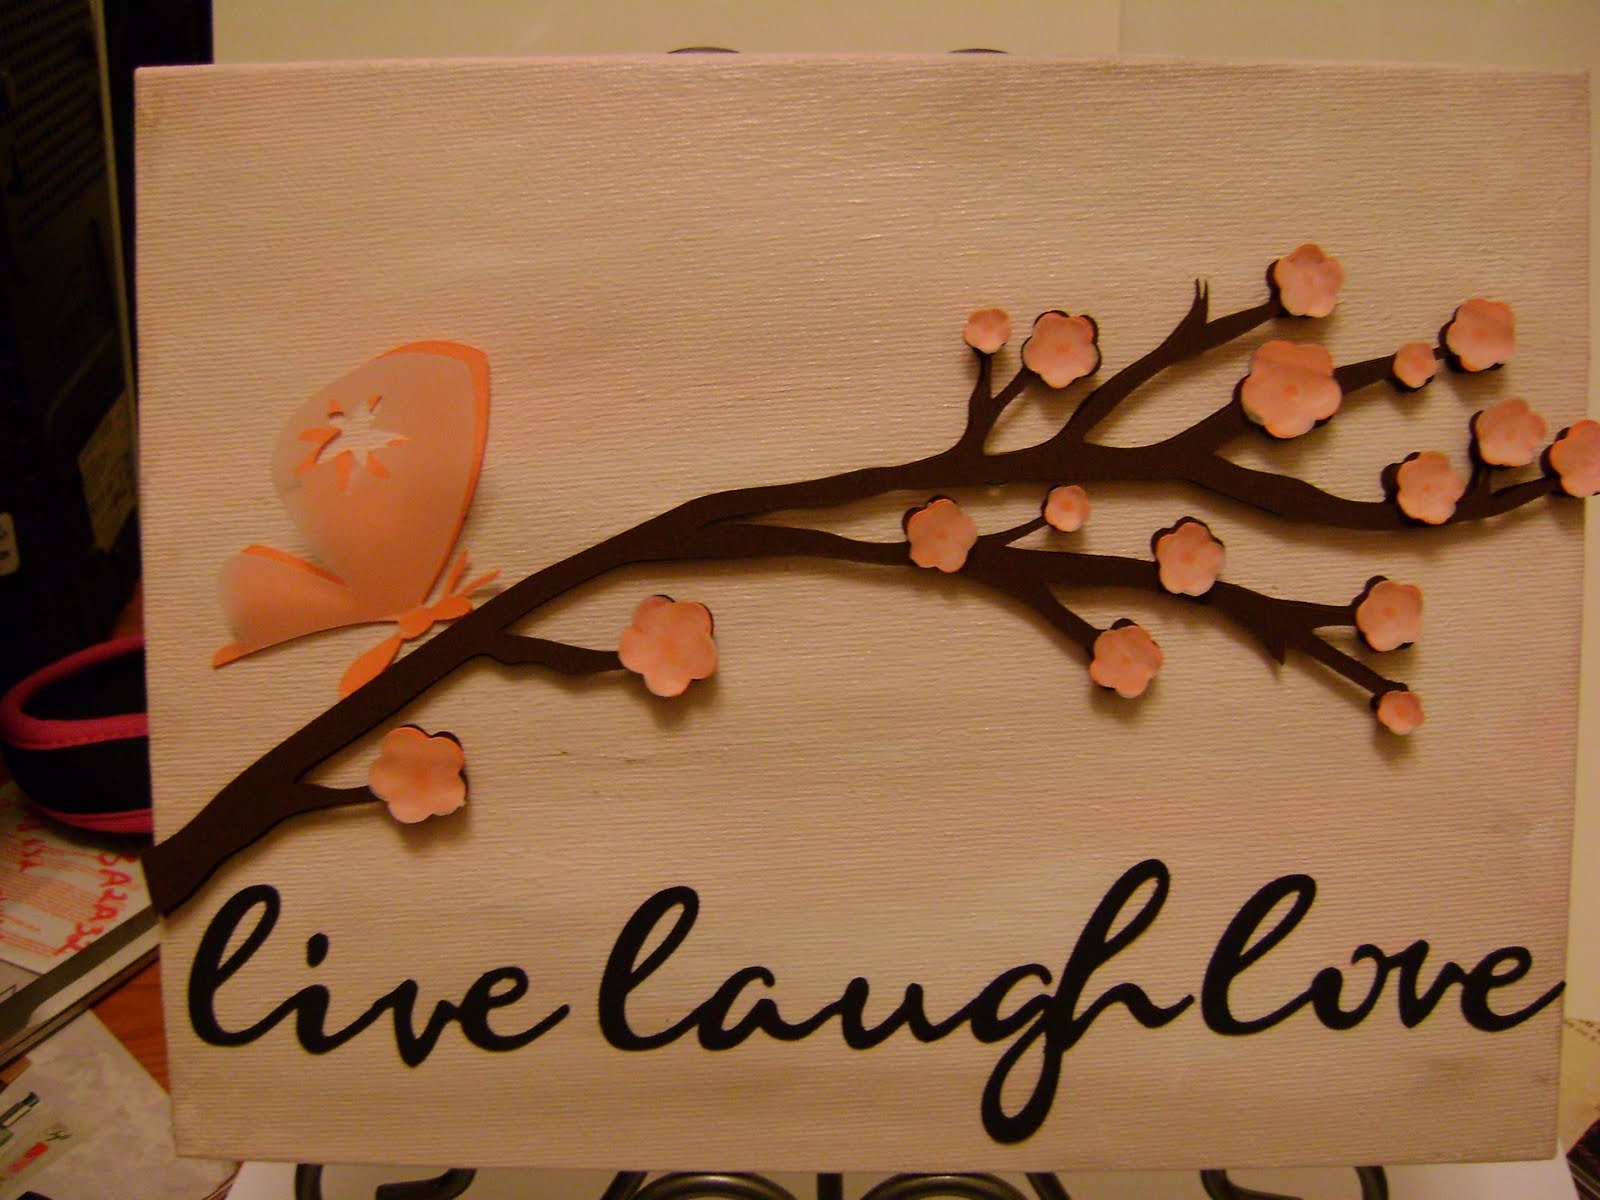
first I painted a 7"by 9" canvas using white, red and brown paint
then I cut out the stick from the pagoda cart and layered with foam dots, the flowers were cut first in pink then in vellum and layered, then using a stylus I ran it over the glued flowers to give them some dimension. then I cut out a butterfly from gypsy wanderings 2 times, once in the pink and one time in vellum, i then only adhered the vellum to the bottom to give it some dimension, then I cut out the words I welded on my gypsy using the gypsy font live laugh love, then glued it on the bottom. All other items were then glued into place.
My item I called it "live laugh love"
Shelia M.


Materials: 4 sheets of 12x12 cardstock/paper your choice of color.
1 Sheet 8 1/2x11 white cardstock.
1 small 5x5 scrap paper
Glue
skittles, diamonds amount per taste
frame of your choice - I used CM as after season over I will insert page in my scrapbook to start Christmas pages.
Carts: Gypsy Font, Gypsy Wonderings, Joys Of The Seasons
Worked design on a 12x24" mat on the Gypsy to allow more room to maneuver letters and switched to 12x12 after completed.
1. Outline square at 8", surrounded by shadow letters from GF at 2" high on the page 1 of my LO. All letters welded together. Many times letter widths
were changed to make the word fit.
2. Using the cutout GF at 2" height form letters in a square. This time adjust each letter to individually place to insure perfect
shadowing, again many letters will need to be adjusted to fit within the outline letters. I did weld letters so not every letter is placed individually.
3. Another square is made this within the 2nd page this time at 7 1/2" allowing it to float on page and background square to show through as a shadow.
4. On page 3 on my gypsy I used JOTS for a light piece of greenery at 3.64wx1,12h forming a square centered over the prior two welding it together for one
cut. I also cut 4 strips at 1/4" wide from this left over paper so don't throw out.
5. On page 4 I made the words King 1.25h and Lord 1.5h to hang on frame. Also on separate sheet, The Christmas story from Luke was printed on the 8
1/2x11 sheet of paper.
6. Put together, shadow letters first, ornately cut letters next, colored square place on top of shadow square. Then place 1/4" colored strips within both
squares so the shadow color doesn't overwhelm. Add greenery and place diamonds and skittles to your preference. Then center Bible passage under
the squares as if framed.
7. Flip over adhere double sided foam squares and attach to your background paper. Frame or place in your scrapbook.
Pam R.


Santa Collage
(A little jazz on top of the fireplace mantle)
Cartridge used:
Gypsy Font, Gypsy Wanderings, Christmas Solutions
Materials:
12 x 12 cardstock papers - 1 black, 1 white, 1 pattern (from K & Y) Life’s Journey
Perfect Pearls
Perfect Ink Refresher
Brush to apply Perfect medium
Water and mist spray
Stickles
White glitter
Adhesive - pop dots, zip glue (or strong acid free liquid glue)
And of course the Gypsy and Cricut
Instructions:
You can use another dark pattern paper for Santa but I preferred to use the perfect medium to get the iridescence, so that with lights on it will really shine. Weld the Santa (CS), sleighs (shadow feature from CS) and the letters T, O, T, O, W, N (GF) in the gypsy. Then cut with black 12 x 12 cardstock. Also in the same file add letters H,O, H, O, H, O (GF - you can wed if you want) . In the next page of the gypsy file using the Santa template as guide weld together snowflakes(GW) to form beard. Add a reindeer (GW) and resize near the pompom of Santa’s cap. Weld together mistletoes (CS) and an ornament(CS) to form Santa’s nose and beard. Also add 2 heart(GW) and a musical note(GW) sizing it to form the eyes and brows .Weld letters (from GF) S, A, N, T, A together; C, L, A, U, S together; I, S together and C, O, M, I, N, G together resizing and arranging to go in the cap area of Santa. Also add the sleighs (CS) regular keeping it one or two size smaller than the ones in previous page in Gypsy file. Cut all this in white cardstock.
Take the black Santa cutout and spray it with perfect ink refresher and work it in. With a brush apply the different perfect pearls trying to add more of the reds near the cap and blues near the beard. After you finish applying spray with a water very lightly to set. Allow it to dry (you can also hasten the process with heat tool ).
Add glitter and stickles to the white pieces and allow to dry. Stick it on the black Santa base in the respective places using zip glue and pop dots to give dimension (Caution: a strong glue is needed to stick the pieces on top of perfect medium. You might also need to apply on the back of the pop dots to make it stick). Then glue the black decorated Santa to the pattern paper of your choice. I have used pop dots to give more dimension. Add the stickled words HO HO HO in it with tiny pop dots. Apply some more stickles to the background if you want. You can mat it and add to a frame (which I have not done yet) and put it up on the fireplace mantle during Christmas time.
Happy Holidays!
LesleyAnne B.


Hi Dawn,
attached are my pictures for the G contest from the cricut MB. Below follows my cuts. Thanks for the opportunity!
xxxxxxxxxxx
The following cartridges were used:
Gypsy Wandering (GW)
Gypsy Font (GF)
Accent Essentials (AE)
Winter Woodland (WW)
Joys of the Season (JOS)
Using the Gypsy, create the following cuts:
page 1:
3.50 x 5.50 AE rounded edge rectangle welded with two 1" tall WW birds and chipmunk. Layer with birds in brown and blue, rabbit in grey, chipmunch in dark brown.
Cut 1" tall GF "2009" welded and rotated 90 degrees for cream shadow, repeat in GF in red.
page 2:
4.50 x 5.50 AE rounded edge rectangle welded with 3.80 x 5.28 JOS shadow Christmas tree. Layer with brown base, green tree, white snow. Glitter and accent with crystals.
page 3:
5.50 x 5.50 AE rounded edge rectangle welded with 3 JOS shadow snowflakes. Layer with light blue and white snowflake accents
page 4:
6.50 x 5.50 AE rounded edge rectangle welded with 2.82 x 3.00 GW shadow snowman
layer with blue blackout, white snowman, black hat and arms, red scarf and hat accent. Colour in nose, eyes, mouth with marker.
page 5:
7.50 x 5.50 AE rounded edge rectangle welded with 3.26 x 3 WW shadow Horse
layer horse with black base, brown body, green harness
cut 5.52 x 3.00 WW Sleigh in gold, layer with dark green, accent with holly
create 2 tags: 4.11 x 2.66 WW MgcWntr tag-shift green twice, layer one with 3.99 x 2.66 WW MgcWntr tag
page 6:
8.50 x 5.50 AE rounded edge rectangle welded with 2.52 x 5.50 WW shadow Bldg1
layer house with yellow base, tan exterior, blue gables, white snow layers
page 7:
9.50 x 5.50 AE rounded edge rectangle welded with 5.50 x 2.25 WW shadowed saying "winter woodland" rotated 90 degrees
layer with 4.60 x 2.23 WW saying "winter woodland"
To finish: add accents to each page, including journaling and picture mounts. Bind with 3/4" Bind it all; tie off with red, green and white ribbons.
Vicky W.

BASIC CARD ~ Thinking of You
Cartridges used ~ Gypsy Wondering, Gypsy Font, and George
DIRECTIONS:
1/4 cut of pattern paper
3-D Dots
1 Skittle
Cuts from Gypsy Wondering ~ "Thinking of You"
Cuts from Gypsy Font ~ Hearts
Cuts from George ~ Rectangle
Use color of your choice for creating card
1. Cut 1/4 of pattern paper (your choice); glue on card using a spray adhesive for faster application.
2. Cut designs using Cricut and your Gypsy.
3. Glue rectangle (using spray adhesive) and place in the center of card.
4. Glue the "Thinking of You" (burgandy onto white) using spray adhesive.
5. Add the 3-D dots to the back of shadowed "Thinking of You" and place on the center of the rectangle.
6. Spray adhesive glue to the hearts, cutting one off and placing in top left corner and place other two hearts in bottom right corner.
7. Glue skittle on the center of the flower.
Subscribe to:
Posts (Atom)